
")


 Reels To Limit Their Reach Of Reposts From TikTok")


Want a reference of a dynamic and engaging UI, you should definitely consider a Netflix Card of the mobile version. It has a hovering effect, scrollable view, and an interactive thumbnail of the Netflix series, clicking on which users can easily get a brief of the casting, plot of the story, and duration. This app interface is created using React Native. This blog, curated by the experts and editors of React Native app development company will give you an insight into creating a Netflix slider.
Let’s begin the process.
To get the React Native Environment in your system
This is the first and foremost step. Install software such as Node, JDK, Android Studio, React Native CLI, and an IDE. IDE is used for editing the code. So, it can be any.
I always prefer to work on the VS code editor. You don’t have to write the complete code. The suggestion in the VS code editor makes it much easier and effort-free. It has worked for me. I hope it will work for you as well.
Also, take note that I have considered the React Native CLI package for this project. If you want to work with the Expo CLI package, the software and SDK will differ.
You can check the linked article for further help.
Build a template for the Netflix card
You will need a space or rather a container to tire your generated code. This is what we call a template folder. It is a simple folder that you have to create in your system. You cannot undertake the basic step of making a folder. You need to run a command line in the command prompt from a specific local folder. This command line will create the entire folder with the basic files required in the React Native project.
The command line is given below.
npx react-native init Netflix-Card –version 0.68.1.
Note that you will use the newer version of React Native (0.68.1).
Here, the project does not need any third-party libraries. So we can skip this step and move ahead.
Working on the Programming part
For the NetflixCard, we need to create codes for five files. Out of which, the App.js file is already stored in the template folder. All you need to do is make some changes in the coding part.
You have to build the LiveVideo.js, Tv_Video.js, and NetflixCard.js files under the ‘Component’ folder.
DemoProduct.js file
This is the data storage file. You need to create two arrays namely demo_data and Video_data under which you have to add the description of the Netflix content you want to present on the main screen.
Let me give you a code snippet from the DemoProduct.js file.
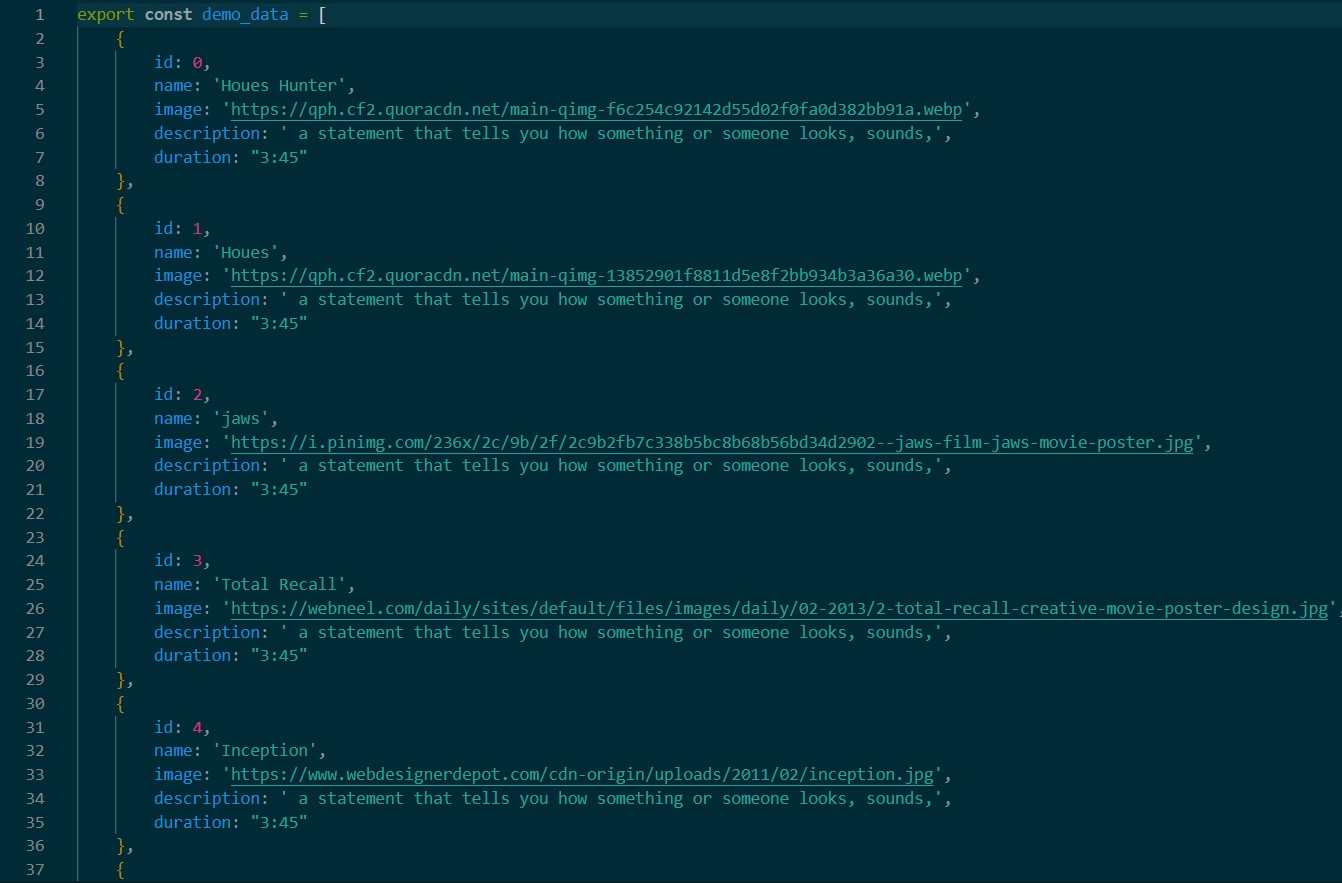
Image 1
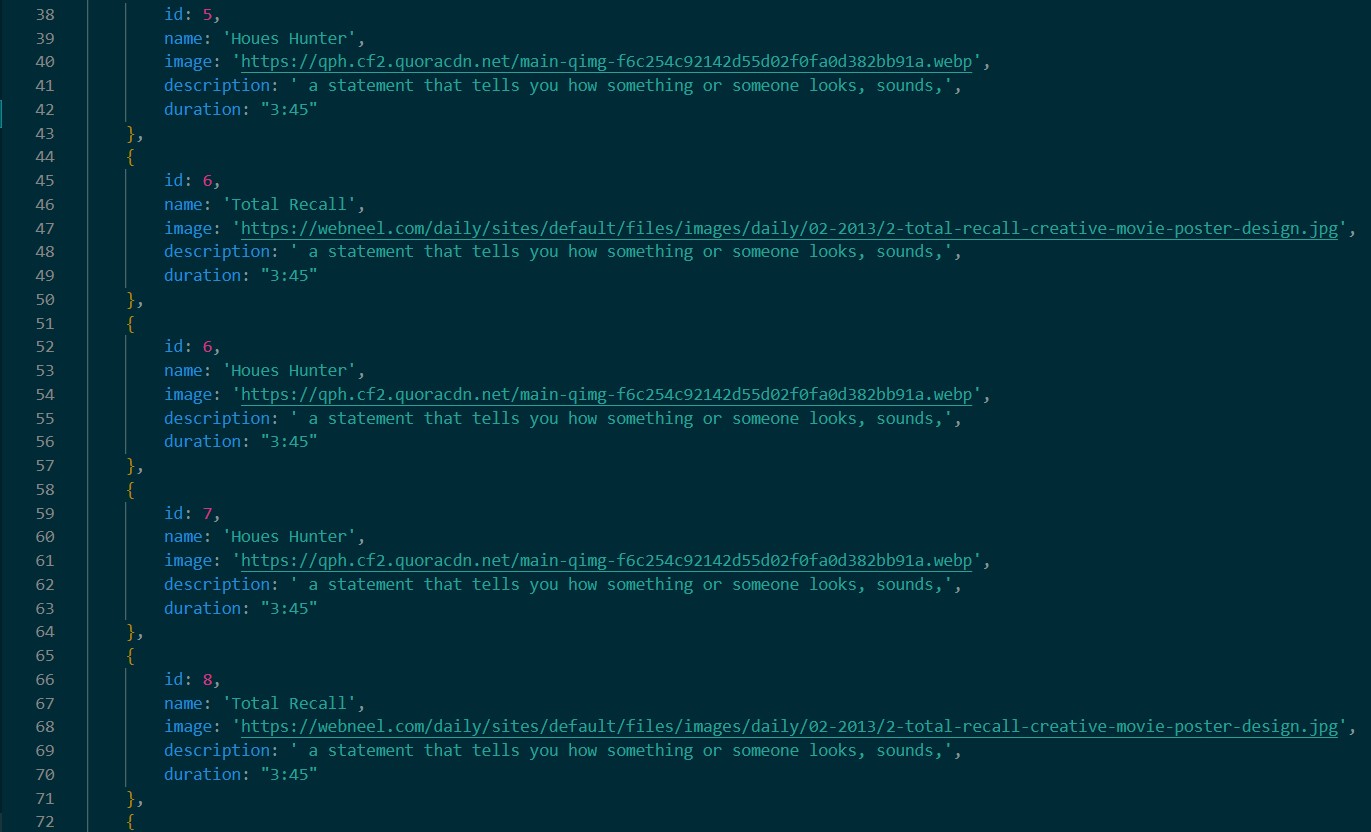
Image 2
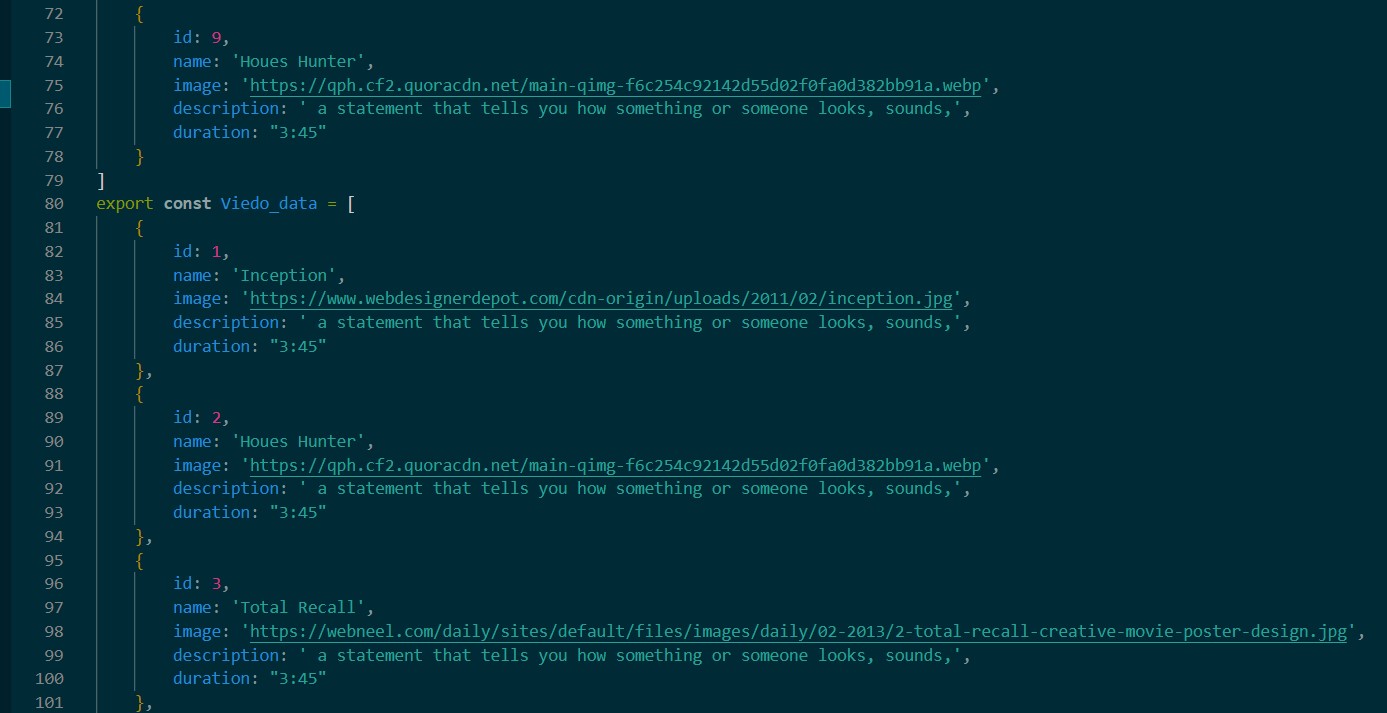
Image 3
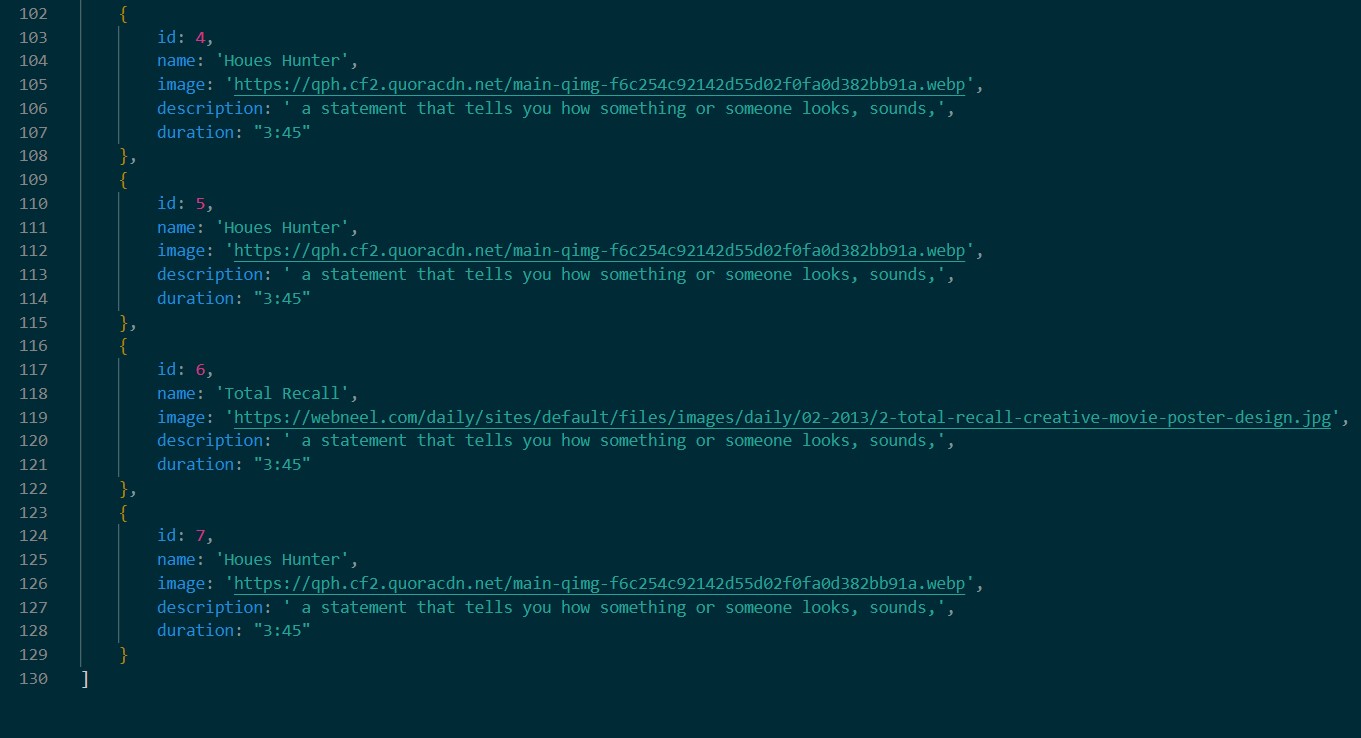
Image 4
As you can see, there are two kinds of arrays with multiple objects embedded in them. Each object has five property-value pairs. Each property value makes an element. The properties are name, description, image duration of the content, and a specific id.
LiveVideo.js file
This is the second file for the project.

Image 5
The code starts with importing the required components. The components are Dimensions, FlatList, Image, StyleSheet, Text, TouchableOpacity, and View. Apart from this, it imports both the demo_data and Video_data from which the content source will be taken later in the codebase.
It defines the main component, i.e., the LiveVideo, and also uses the Dimensions component to get a responsive width for the app view.
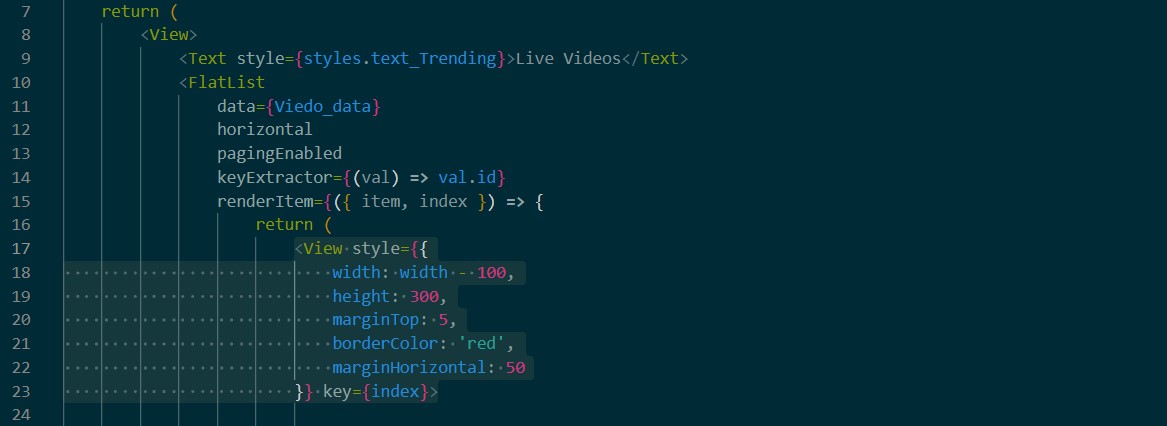
Image 6
The code returns the main View component under which all the other elements are stored. This part of the project creates a ‘Live videos’ section with the heading ‘Live Videos’. The data source for this section is taken from the Video_data. The FlatList component is used to present the list. It is built horizontally and has the pagingEnabled functionality.
The keyExtractor property is used to obtain the id from the considered object and consider it as a key within the data structure.
Another View component is used to create the container of the list view. It has a specific width, height, margin at the top, horizontal margin, and border colour.
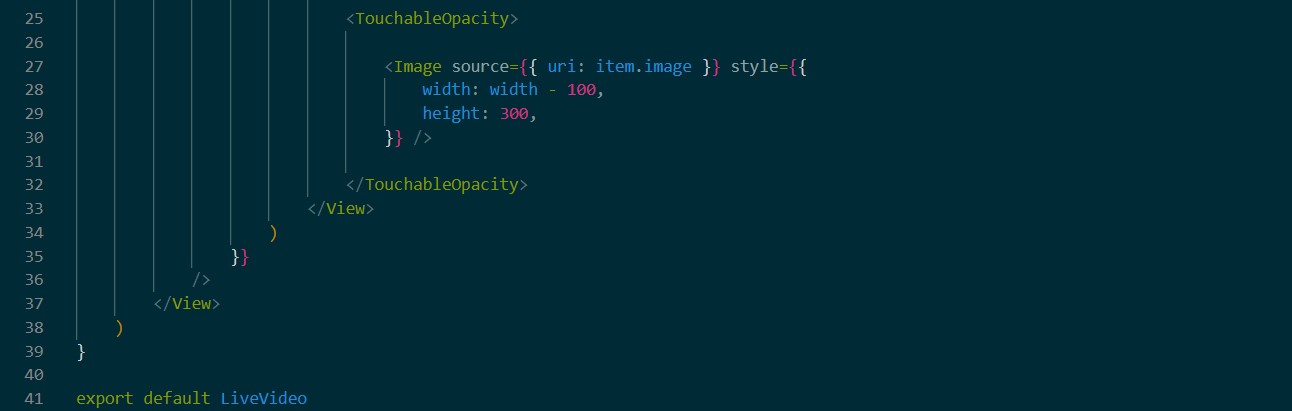
Image 7
TouchableOpacity is a core component of React Native. Adding this in a segment makes the segment touchable or clickable. In this project, the TouchableOpacity component is used to make the content’s image touchable. No other actions are added further.
The image source is taken from the DemoProduct.js file.
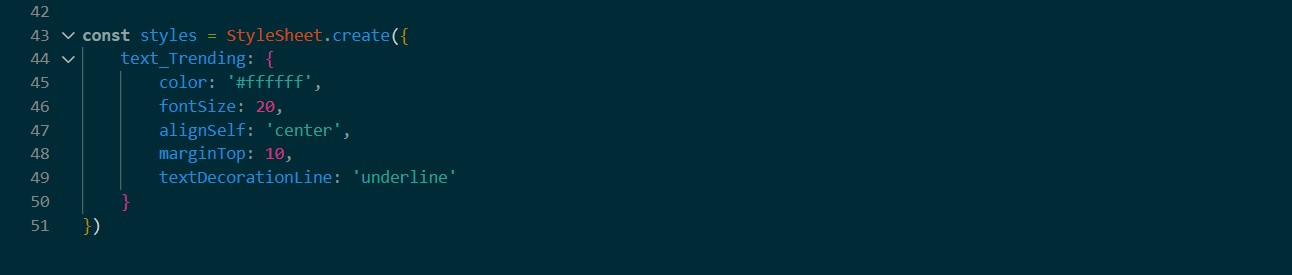
Image 8
This is the stylesheet segment. Text_trending object is considered to style the text of the ‘Live Videos’.
Tv_Video.js file
This file is the same as that of the LiveVideo.js file. The only change is that this file will create another segment named ‘Series Videos’. Consider the image snippets 9, 10, and 11 for the Tv_Video.js file.

Image 9
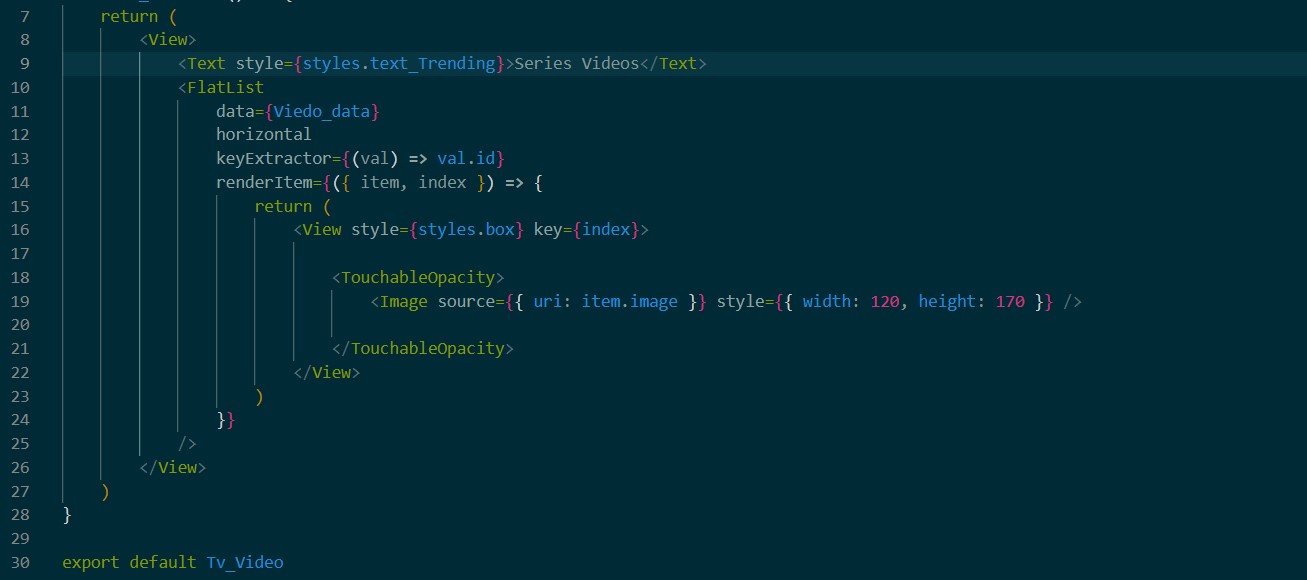
Image 10
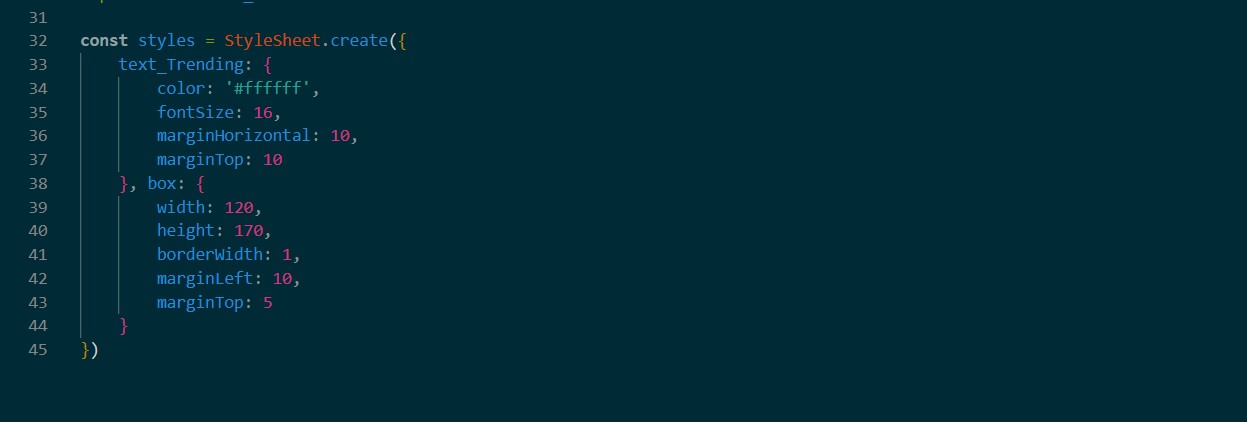
Image 11
In this file, two style objects are considered namely box and text_trending. The text ‘Series Videos’ will be styled with the styling object ‘Series Videos’.
NetflixCard.js file
It is the main file of the project as it will comprise all three segments (Live Videos, Series Videos, and Trending Videos) in it.
Let’s start the codebase.

Image 12
Import all the components from the React libraries and also from the other files of the project.
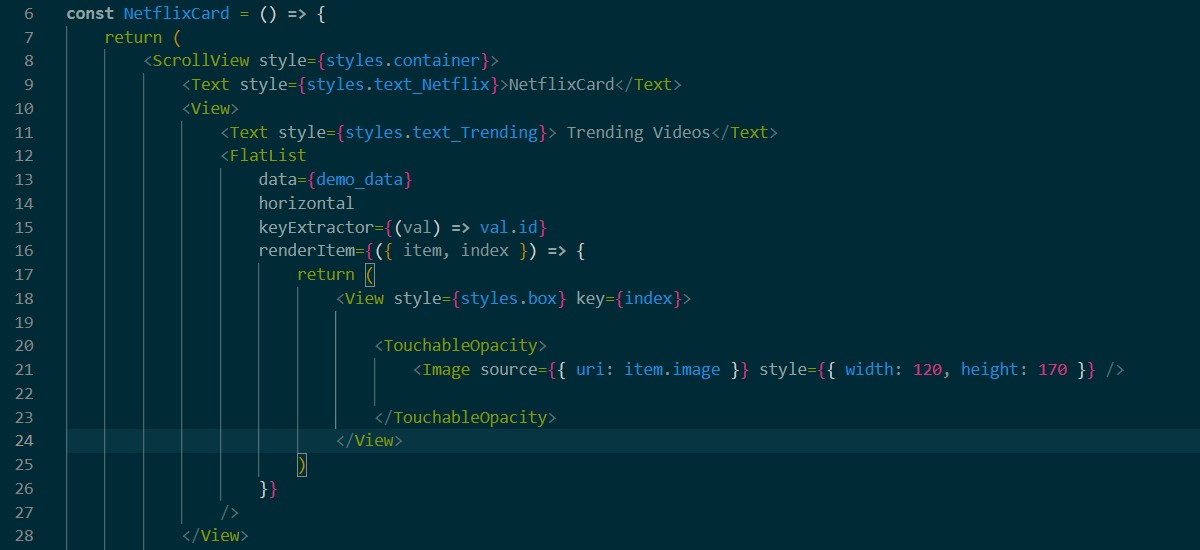
Image 13
It uses the ScrollView component to add a scrollable element to the screen. This part of the code adds the text ‘NetflixCard’ at the top and also builds the segment of ‘Trending Videos’. However, it considers the data source as demo_data, unlike the other two files.
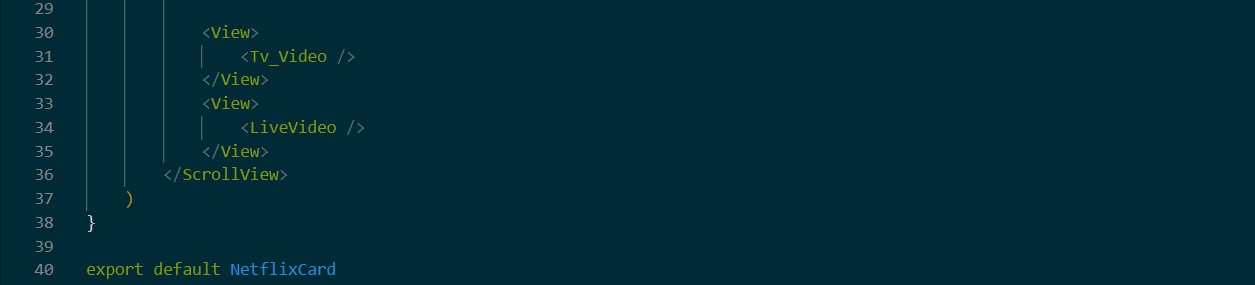
Image 14
As it is the main file, it stores all three sections using the <View></View> tag.
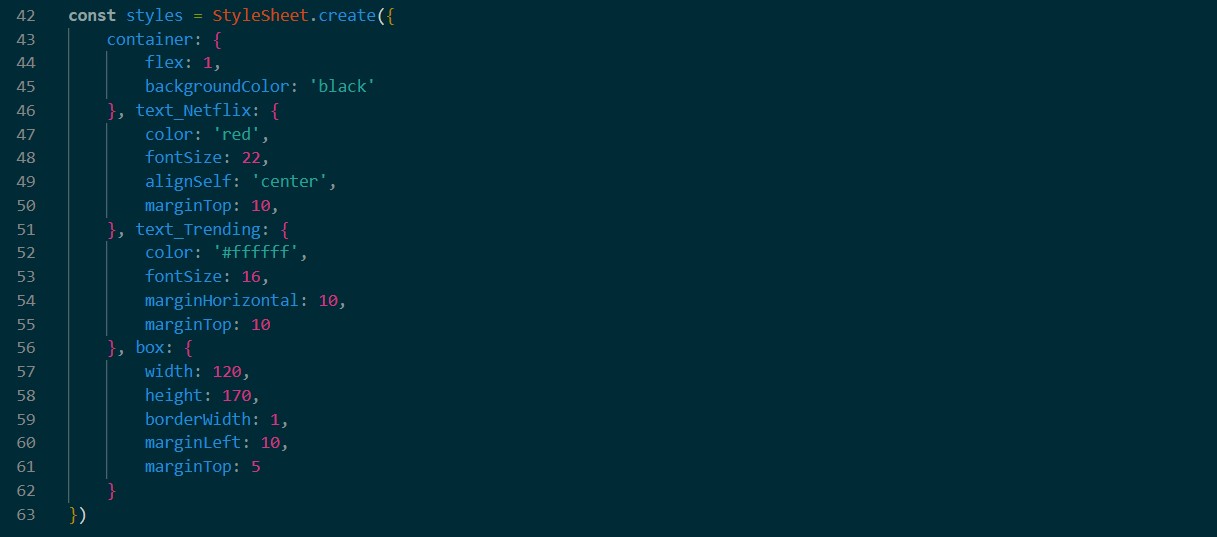
Image 15
The StyleSheet segment used in the React Native framework is the same as that of the CSS stylesheet.
App.js file
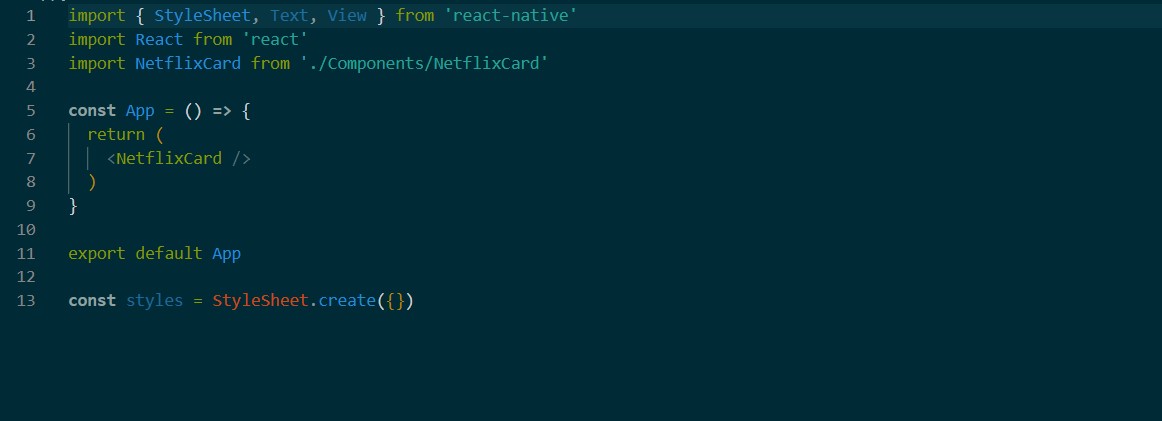
Image 16
As we have already created the different segments in different files. You only have to return the main NetflixCard component. Refer to how it is shown in image 16.
After completing this step, you have to execute the program.
To execute the codebase on a virtual device
Open the cmd from your app folder and pass the npm install. Also, pass npx react-native run-android on the same terminal.
Your project will activate on the emulator if no bugs arise in the code.
It will be the same as shown in image 17.
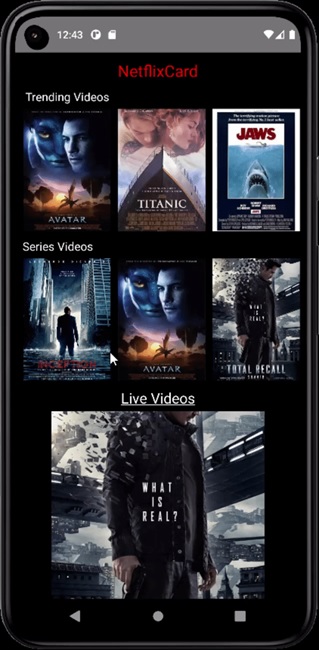
Image 17